oven baked spinach and goat cheese stuffed pork chops

Image

I love anything that’s dipped in bread crumbs and fried. It’s my weakness. So, lately I’ve been trying to slow down on the pan frying, and increase the oven baked deliciousness that is so much healthier for you. This dish is creamy, juicy, and very filling, and definitely one of my new favorite ways to make pork! I served this dish with some homemade spaghetti with pesto (you can find my pesto recipe here)!

Ingredients

2 boneless pork chops
bread crumbs
small log of goat cheese (I used homemade, will be posting the recipe soon!)
a few handfuls of spinach
a clove of garlic
a shallot
a couple tablespoons of mayonnaise
parmesan

Instructions

Preheat your oven to 350 degrees. Mince a shallot and a clove of garlic. Brown in a pan and add your spinach. Once the spinach is wilted, and dark green remove from the heat. At this point you can either use the full leaves, or throw the spinach, shallots, and garlic into the food processor to get a nice fine chop.
Slice your pork chop through the center, aka butterfly it, and pound it out so it is nice and thin. Spread your spinach mixture and sprinkle with goat cheese. Roll up the pork chop and tie it with some butchers string. Spread a little bit of mayo over the top and sprinkle with bread crumbs and some parmesan. Bake on a cooling rack, on top of a cookie sheet. This will allow the air to reach all around the pork and will keep it from getting soggy. Bake until it reached 170 degrees, about 30-40 minutes. Serve with your favorite side and enjoy!

Image

ImageImageImage

Image

Image

warm quinoa bowl with greens and mixed veggies

Image

Lunch is the meal I struggle with the most. Usually during lunch time, I’m at work or school and the easiest option is running to starbucks or au bon pain, or any similar option. In the mornings I’m not usually functioning enough to make myself something to bring along, so this week, I prepared a little something that I can grab and go with. This recipe is really just a base idea for something you can customize with whatever your favorite veggies are, or what ever you need to use up in your fridge!

Ingredients

1 lb of ground turkey (I use 93% lean)
1/2 lb italian sausage (I use sweet links and take them out of their casing because they are usually cheaper than the preground sausage)
1 can of crushed tomatoes
1 cup quinoa (uncooked)
1 onion
1 large clove of garlic or 2 small
your choice of greens and veggies (I used baby spinach, brussel sprouts, italian peppers, and leeks)

Instructions

Brown your ground turkey and sausage in a large pan with a drizzle of olive oil and some salt and pepper. I also threw in a little bit of chili powder, paprika, basil, oregano, and parsley. While the meat is browning, follow the cooking instructions for your quinoa. When the meat is fully cooked, remove it from the pan, and add your onion, garlic, leeks, and peppers with some more olive oil. Once these have started to soften add your brussel sprouts and spinach. Add the crushed tomatoes and ground beef and mix it all together. When the quinoa is finished cooking, add that to the meat and veggie mixture. Once everything is mixed together, you can use this as stuffing in stuffed peppers or stuffed squash, or you can just eat it plain. I also like to add a slice of fresh mozzarella on top as an extra treat, and melt it for a couple minutes under the broiler. Serve and enjoy!

Image

Image

Image

Image

Image

french toast

Image


When I woke up this morning I was starving- but when I got to the kitchen and took out my eggs to make my usual omelet, I realized just how sick I was of eggs. I eat them all the time, and they begin to lose some of their excitement after a while. So, I dug around my kitchen to try and find something to whip up, and I remembered I had the last little bit of a baguette sitting out, which would mean it would be just stale enough for french toast! Growing up french toast was one of the family favorites, and it had been way too long since I had any.

Ingredients

slightly stale bread
1 1/2 cups of milk, half and half, or heavy cream (I actually used an almond and coconut milk blend)
2-3 eggs
vanilla extract (I use vanilla bean paste)
cinnamon & nutmeg (Wholefoods makes a great blend of cinnamon, nutmeg, cloves, allspice, lemon & orange zest that I used)

Instructions

Mix together the milk, eggs, and spices until combined. Place sliced bread into the mixture and let it soak up some of the liquid. Flip over and allow the other side to absorb some liquid as well. Once all of your bread is dunked, melt some butter in a skillet and place the slices of bread into the pan. Cook until golden brown on both sides, and serve with your favorite maple syrup!

Image

Image

Image

Image

ricotta and leek ravioli with pesto

Image

I bought myself a pasta roller almost a month ago now- It’s been sitting on my counter, ready to go, but I was too intimidated to use it. Finally today I just went for it! Ravioli has always been one of my favorite foods so I decided I’d try that first. And because I was making fresh pasta, I thought it would be best to make fresh ricotta as well! It’s definitely a time consuming process overall, but very fun, and very worth it!

Image


Ingredients

Pasta

2-3 cups of all purpose flour
4 eggs
1/2 tsp salt
tiny pinch of nutmeg
1 tablespoon of olive oil

Ricotta

3 cups of whole milk
1 cup of heavy cream
pinch of salt
juice of one lemon

Filling

1 cup of ricotta (home made or store bought)
2 caramelized leeks & 1 clove of minced garlic
salt & pepper to taste

Pesto

a few handfuls of basil (remove stems)
2-3 cloves of garlic
1/2 cup of pine nuts
1/2 cup of parmesan cheese
salt & pepper
olive oil

Instructions

Ricotta

Add the heavy cream and milk to a large sauce pan or stock pot. Once it begins to boil and foam, add the juice of one lemon and turn off the stove. Give it a few stirs, and then allow to rest for a couple of minutes and form curds. Once the curds have formed, strain them through a cheese cloth and allow to separate from the whey. Refrigerate once everything is separated and to the desired consistency (for this I’d recommend a slightly thicker or stiffer ricotta).

Pasta

Make a little well in your all purpose flour and carefully crack your eggs into the center. Add the salt, nutmeg, and olive oil and slowly mix, starting with a fork, and then moving to your hands. When everything is combined and not too sticky (you may have to add more flour), split into four pieces. Make each piece into a patty, so it’s thin enough to go through the pasta roller. Continue rolling out until you get a pasta sheet of desired thickness. Put pasta sheets in the fridge while you assemble everything else.

Filling

Dice up your leeks and make sure to thoroughly clean. Add leeks, minced garlic, and a few tablespoons of butter to a sautee pan and allow to cook down until they are a nice golden brown. Once these are complete, you can either keep them at a rough dice, or quick throw them into your food processor to make a little bit more of a paste. Mix this with your ricotta.

Pesto

Add all of your ingredients into a food processor and blend, slowly adding olive oil until it reaches desired consistency.

Assemblage

Take one pasta sheet and dollop a teaspoon or so of filling, and make sure there will be enough room to cut into individual ravioli at the end! Take your second pasta sheet and carefully lay over the top, and lightly press down around the filling to form your ravioli. Cut apart and to make sure the pasta sheets are sealed together, stamp with the end of a fork.

Cook ravioli for 2-3 minutes, or until they float. Gently strain them and drizzle with pesto. Top with a bit of parmesan or romano and enjoy!

Image

Image

Image

Image

Image

Image

Image

Image

Image

brie, apple, and bacon turkey burger

Image

After a long bout with tonsillitis, I’m back! And because I feel so bad for my lack of posts, I’m sharing one of my favorite recipes with you all. One of my favorite foods ever is the cheese burger- you can do so much with it and really mold the flavors that you are looking for.

Traditionally, I’m all for your typical ground beef burger, but after experimenting with ground turkey for a while, I’ve decided this combination is AMAZING!

Ingredients

ground turkey
seasoning (salt, pepper, paprika, chili powder, onion powder, garlic powder, parsley)
olive oil
bacon
onion
apple
ciabatta rolls

Instructions

Add your ground turkey and spices into a bowl and mix together- I also add a drizzle of olive oil because ground turkey doesn’t have a high fat content. Form your pattie- you can do sliders or full sized burgers for this so it’s up to you! I also never try to make my burger too thick because unlike beef, the turkey needs to be cooked all the way through.

At this point I start cooking my bacon. You can either do it in the pan or the microwave, though I prefer cooking it in a pan, so I can use the grease later on to cook my onions. Also when I cook bacon for a burger, I weave the pieces together so they stay on the burger better. Once the bacon is finished cooking, add some thinly sliced onion, and in a second small frying pan drizzle a bit of olive oil and begin to cook your burgers.

When your burgers and onions are nearly finished, give your ciabatta rolls a quick toast to help stand up to all the toppings, and slice your apple and brie. Add the cheese to your burger and allow to start melting. Once everything is finished cooking, put the bacon on the bottom half of your roll, then the burger and cheese, then the apple slice(s), and then the sauteed/ caramelized onions. Generally I would serve this burger with homemade sweet potato fries or kale chips. Enjoy!

Image

Image

Image

Image

Image

oven roasted lamb shank with eggplant parm bake and creamy chard and beans

ImageImage

Yesterday I was feeling the need for something warm, filling, and different. I saw the recipe for a similar eggplant parmesan au gratin, and I knew I wanted to do something similar. So what goes great with eggplant? Lamb. I had never cooked it on my own before, and I was very nervous for how it would come out. Luckily, everything turned out perfectly, and it was a great addition to this hearty meal! I also had some swiss chard sitting in my fridge, and I remembered this great risotto I made a while back that had greens and small white beans in it, so instead of doing it that way, I ditched the rice and transformed it into a creamy side!

Ingredients

Lamb

lamb shanks (or a cut you feel comfortable with)
rosemary & thyme (fresh)
garlic
olive oil
salt & pepper
wine (normally I would recommend a hearty red wine but all I had when I was making this was a dry white wine and it turned out ok!)

Eggplant Parmesan Bake

one medium sized eggplant
roma or heirloom tomatos (i used a mix of both)
breadcrumbs
olive oil
salt & pepper
fresh grated parmesan (romano will work as well)
fresh mozzarella

Creamy Swiss Chard & Cannellini Beans

one can of cannellini beans, drained
a few sliced of pancetta, chopped (optional)
swiss chard
salt & pepper
rosemary
half a container of creme fraiche

Instructions

Throw all of the ingredient for the lamb in a gallon sized zipper bag and let it marinade for a few hours. When it is finished marinading, pour the contents of the bag into a baking pan, and add some more fresh herbs on top of the shanks. For medium rare, you will want the lamb to be anywhere from 130 degrees to 140 degrees internally. I baked mine at 400 degrees for about 45 minutes, with an addition 10 minutes to rest. The size of the shanks will affect the cooking times, so I would check the temperature after 30 minutes to check where the meat is at.

Meanwhile, peel the eggplant and cut in half lengthwise so you can cut half moon shaped slices. Once the eggplant is sliced, place it on a sheet of parchment paper and drizzle with olive oil and put it in the oven with the lamb for a few minutes to start the cooking process. While the eggplant is roasting, slice up your tomatoes and mozzarella. When the eggplant is mostly cooked, take it out of the oven and start layering in an au gratin pan. I layered the eggplant, then the tomatoes, bread crumbs, and parmesan, and repeated. Then I added the mozzarella on top, along with breadcrumbs that I mixed a touch of olive oil and some more parmesan. When there is about 5 minutes of cooking time left on your lamb, put this back in the oven and allow to bake until the lamb is finished resting, for a total of about 15-20 minutes, or until the top is golden brown.

Last but not least are the creamy swiss chard and beans. This takes the least amount of time so do this as the end when the eggplant is about half way finished baking, add your chopped pancetta to a sauce pan and brown. Add the beans, salt, pepper, rosemary, and creme fraiche to the pan and let cook down to a rich a creamy sauce. Add the swiss chard last- it just needs to soften up a bit. This will only take 2 or 3 minutes.

Once everything is finished, you can plate and enjoy!

ImageImageImageImage

flax seed and chive soda bread

Image

After seeing how much you all loved the Oatmeal Bread I posted a few weeks ago, I thought I’d give a different soda bread a try! I saw this recipe on the blog titled Farmette and fell in love with it right away! Hope you guys enjoy!


Image

Image

Image

Ingredients

3.5 cups of flour (i used 3/4 all purpose flour and 1/4 rye flour)
1 3/4 cups of buttermilk
1 tsp baking soda
3/4 tsp salt
3 tbs flax seed
3 tbs chopped chives

Instructions

Preheat oven to 450 degrees. Add all of your dry ingredients into a large mixing bowl and sift. Then add your flax seed and chives. Slowly add your buttermilk- you may not need all of it (I only ended up using 1 and a half cups). Once everything is combined and your dough is slightly sticky, sprinkle a touch more flour and flax seed over the top so it is easier to handle. Place on a sheet of parchment paper and bake at 450 for 10 minutes. Lower the temperature to 400 and bake for another 20-30 minutes (mine only took about 25). When the bread is a nice golden brown, remove from the oven and let cool for 20-30 minutes before cutting into. Enjoy with a smidge of butter (I recommend unsalted)!

bacon, brusselsprout, and brie grilled cheese

ImageImageImageImageImageImageImage


I don’t know about you guys, but my weekend was full of shenanigans. After the late nights, crazy parties, and ridiculous dancing, all I wanted was some relaxing food- and what better than grilled cheese! I adapted this recipe from A Cozy Kitchen – the original was a vegetarian dish, but I thought adding some bacon would put this recipe over the top!

Ingredients

2-3 slices of thick cut bacon
3/4 teaspoon Dijon mustard
1/2 shallot, minced
2 tablespoons of butter
6-7 Brussels sprouts, sliced thin
Brie cheese
salt & pepper
2 slices bread of choice

Instructions

Dice a few slices of bacon and cook them most of the way, releasing most of the fat. Add in minced shallots, thinly sliced brussel sprouts, dijon, and a pinch of salt and pepper. If you need to, add a little bit of butter or olive oil to bacon fat to extend it. While these are cooking down (it should only take about five minutes once you add the brussel sprouts), slice a few pieces of brie to fit your bread. I used Ezekiel bread for my sandwich, but you can use Italian bread, french bread, rye, etc- what ever your favorite bread is!

Once the brussel sprout mixture is done cooking, add a good chunk of butter to a skillet (I used cast iron but non stick will also be fine!), and slowly heat up the pan and melt the butter. You don’t want the pan to be too hot because then the bread will cook to fast and be nice and crunchy, but the cheese won’t melt! While it’s heating, top your brie and bread with the brussel sprout mixture and gently transfer to your skillet. While it’s starting to brown, I even like to cover the skillet for a couple minutes so the cheese will melt even nicer. Once the first side is golden brown, carefully flip and continue to cook the other side, again until golden brown.

Transfer to a plate and cut in half- then enjoy!

ImageImageImage

oven baked spinach and kale felafel

Image

Image

Image

I love my veggies but sometimes eating them can be a chore. I wanted to whip up a fun new way to eat my greens today, so I modified the traditional felafel to to include spinach and kale in addition to the traditional chick peas! Also, here are some fun facts about the health benefits of the ingredients in this dish;

Kale
Kale is low in calories, has zero fat, and a ton of fiber. It is full of antioxidants and vitamins A, C, and K- these vitamins help your skin, you vision, your metabolism and you hydration… vitamin K is even thought to be a cancer fighter! It’s high in iron and calcium, is great for your liver, and is a perfect veggie for detoxing your body! 

Spinach
Similarly to kale, spinach contains many antioxidants and vitamins that are great for you liver, skin, and overall bodily function. It also contains beta-carotene which has been shown to prevent asthma.

Chick Peas/ Garbanzo Beans
A great source of protein, these beans also contain tons of fiber, iron, and manganese; a mineral that helps with energy production and antioxidant defenses. Chickpeas are also thought to lower LDL (bad cholesterol) and because they contain folate and magnesium, they are thought to strengthen blood vessels and possibly lower the risk of heart attack.

CuminCumin is one of my favorite spices, not only for the taste, but for all of its great health benefits! Each teaspoon contains 22% of your daily Iron intake, it has been used for centuries as a bacteria blocker on certain foods, and a study showed it can help fight bacteria in wounds in humans.

Extra Virgin Olive Oil
Olive oil has been known to lower risks of heart attacks and stroke. It is high in monounsaturated fat which can help lower cholesterol and control insulin production. It is also full of antioxidant polyphenol which helps protect your cells from damage- certain polyphenols have also been said to have anti-inflammatory properties.

Ingredients

1 can of chickpeas
a few handfuls each of kale and spinach
2-3 tablespoons of flour (i used barley flour but you can use whatever you have laying around the house!)
1 teaspoon of cumin
1 teaspoon of parsley
a few tablespoons of extra virgin olive oil
half a red onion
two cloves of garlic
1 teaspoon of lemon juice
salt & pepper

Instructions

Preheat your oven to 350 degrees. Add your chickpeas (drained and rinsed!), spinach, and kale to your food processor. Give this a few pulses and then add your spices, onion, garlic, and lemon juice, and continue to mix until everything is combined- it won’t be perfectly smooth and that’s ok. Also, depending on how much spinach and kale you use, you may have to add more flour to help thicken your mixture up a bit more. Line a cookie sheet with parchment paper and spoon a bit of your mixture onto it. I just dropped my mix and let it do its thing, but feel free to shape them into patties. Once they are laid out on the cookie sheet and put them in the oven. I wasn’t exactly timing mine, but I think it took about 20 minutes- when they are done, they will be starting to turn a nice golden brown and will be pretty firm to the touch.

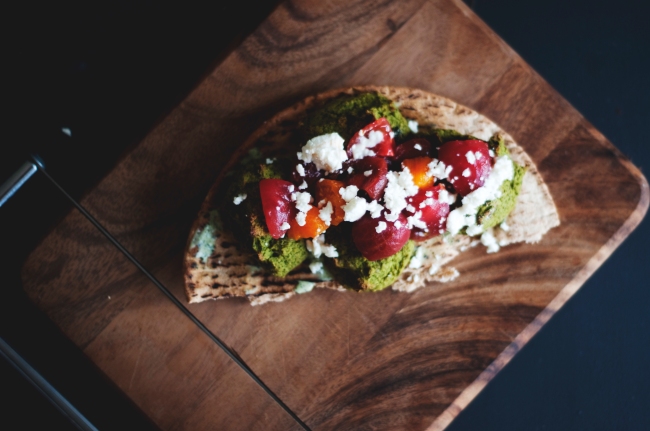
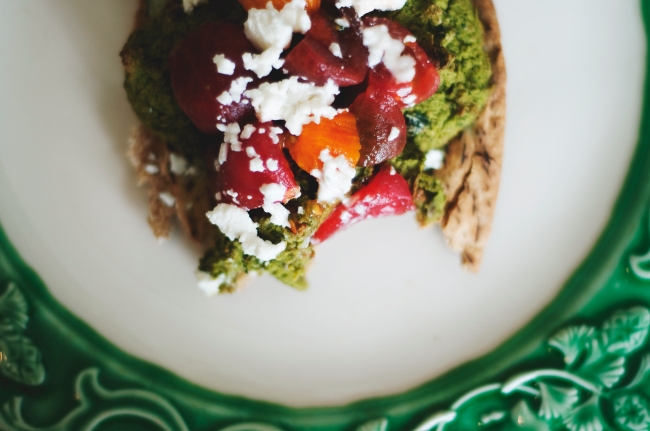
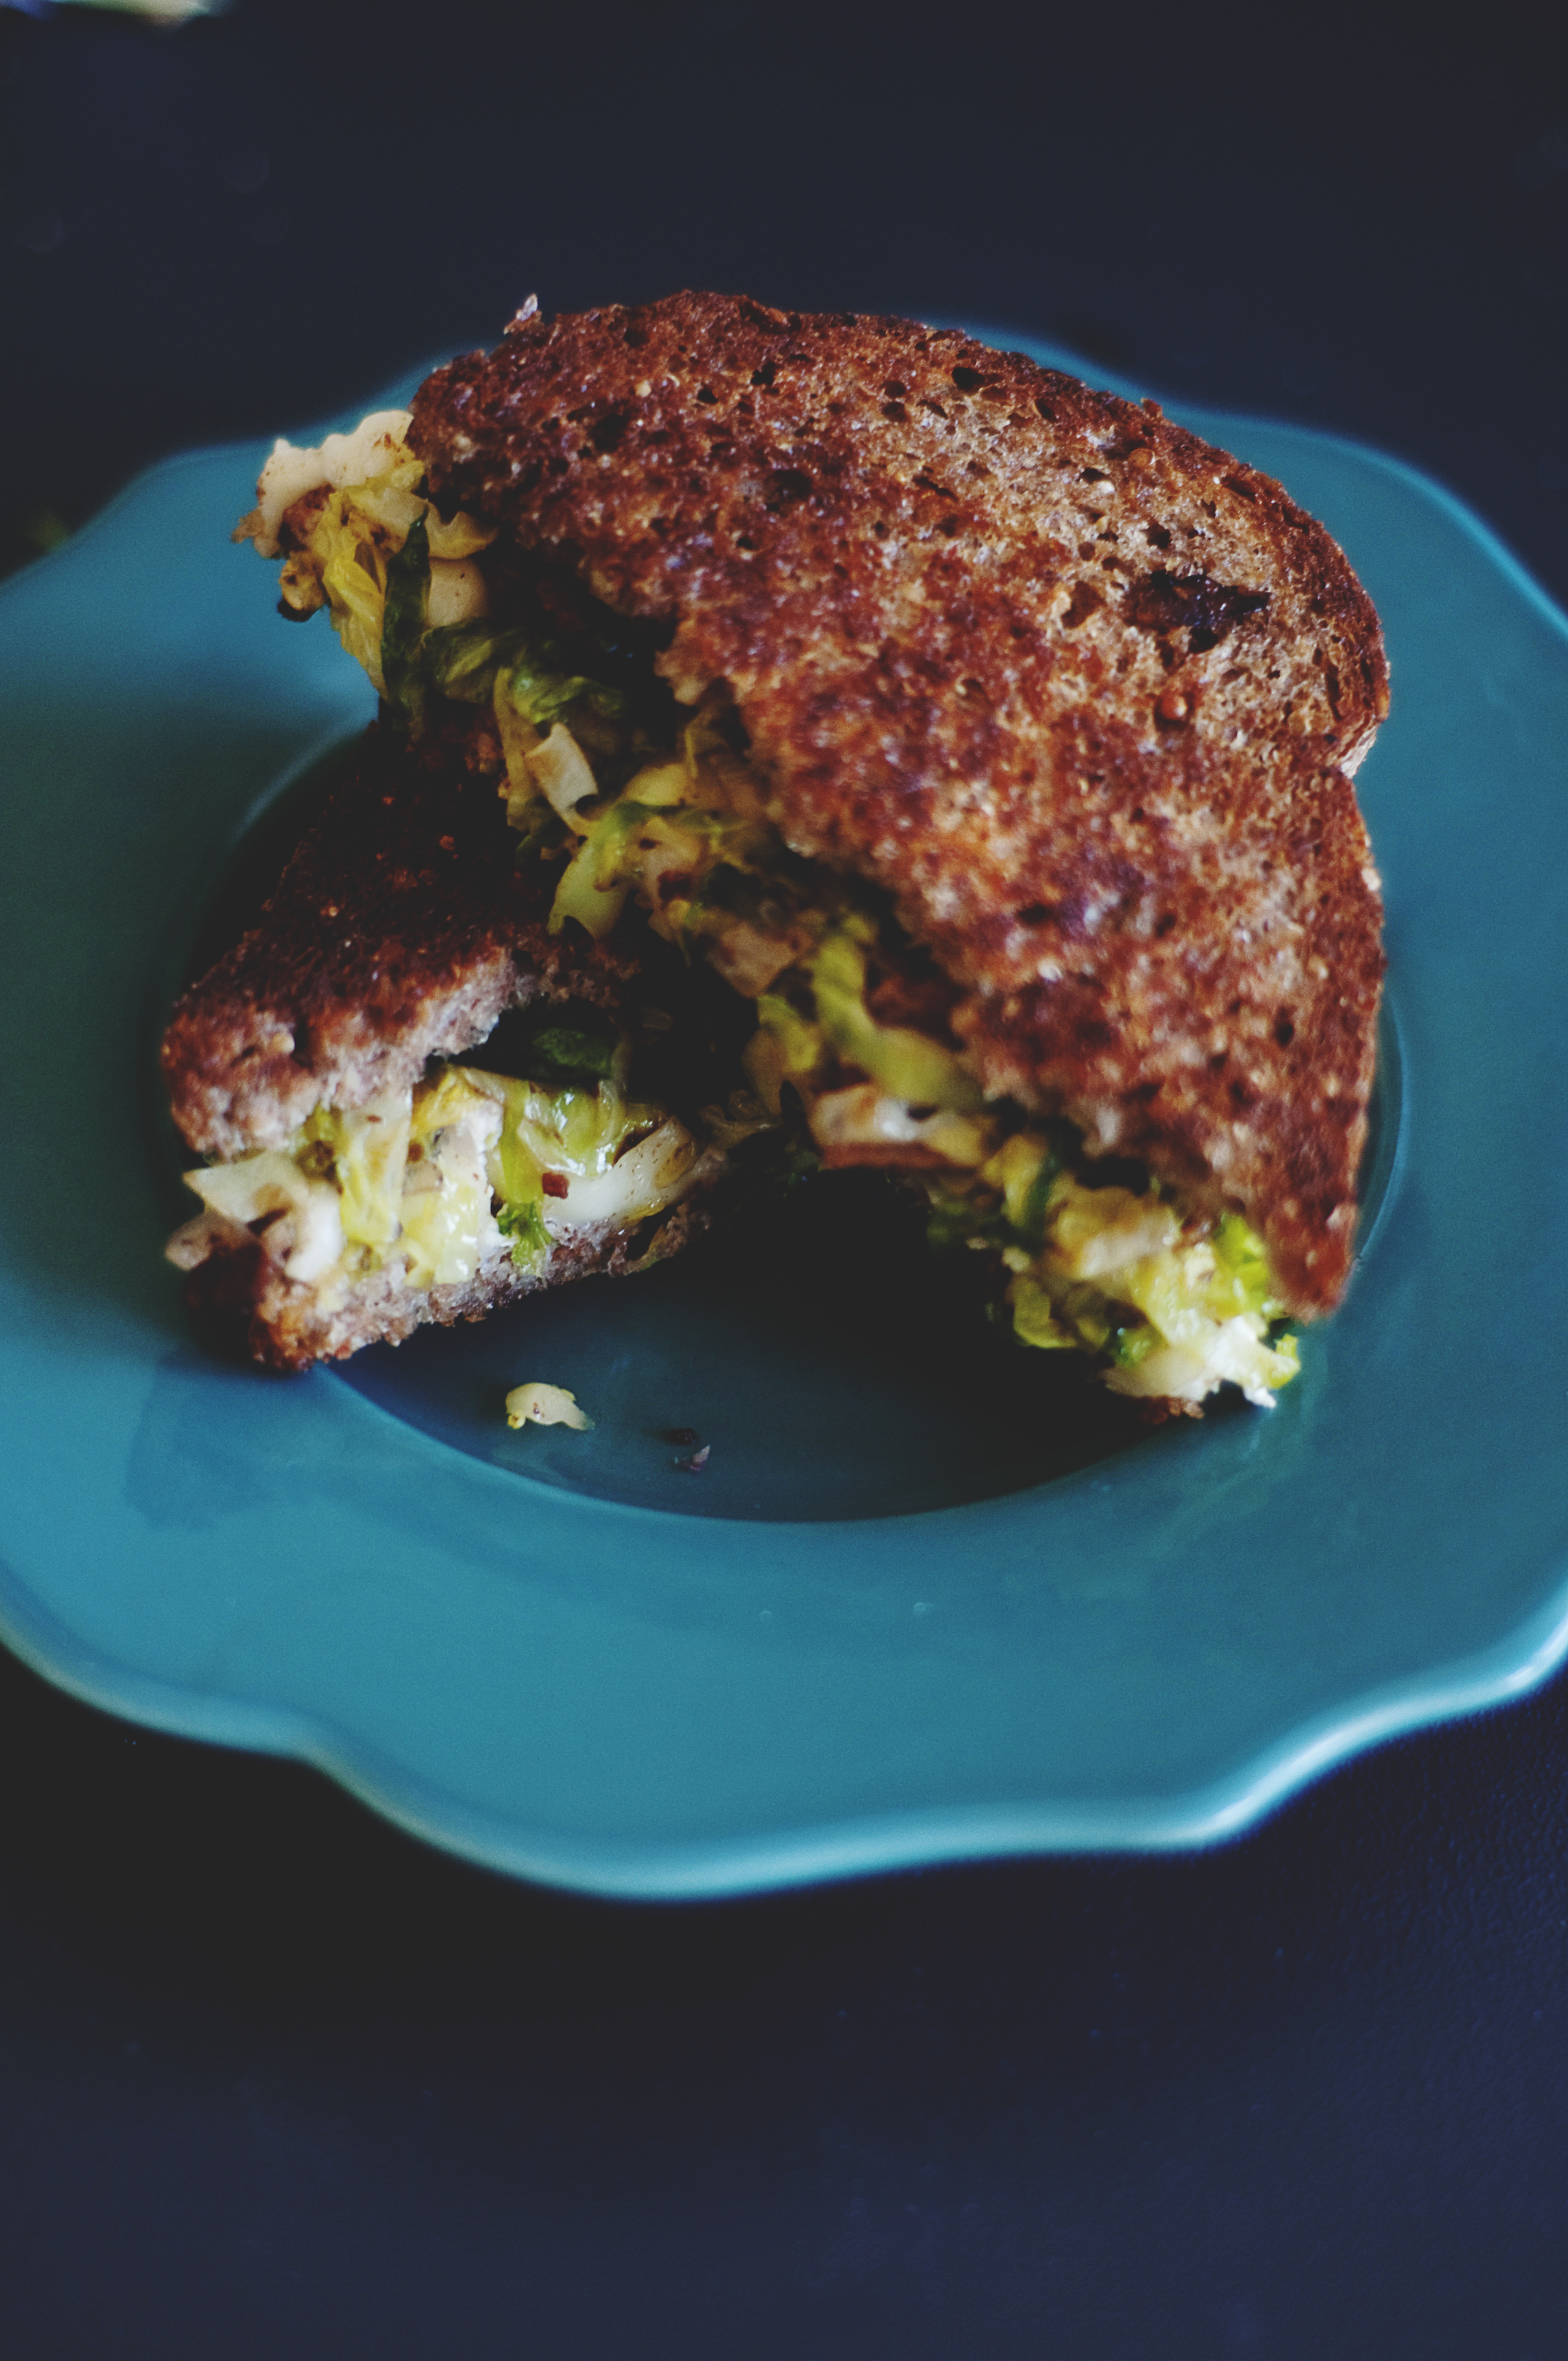
To serve, I chopped up some mini heirloom tomatoes and made a bit of greek yogurt spread to go with the felafel, and threw everything onto a whole wheat pita. For the yogurt spread I added a handful of fresh basil to about a quarter of a cup of plain greek yogurt, some salt, pepper, and olive oil, as well as some garlic powder, and blended it until smooth. I also topped with crumbled goat cheese because, well, goat cheese makes everything better!

Image

Image

Image

swiss chard, fennel, goat cheese & ricotta pizza

Image

Image

swiss chard, fennel, goat cheese & ricotta pizza

I’m a fan of any and all types of pizza… why wouldn’t you want tomatoes and bread and cheese, all in one? At least that’s how I originally looked at it. Now I still love my classic New York cheese pizza, but I love pies that use fresh and healthy ingredients as well! So, when I was scavenging for food in my fridge today, this is what I came up with! Enjoy!

Ingredients

Pizza Dough
2 packets of active dry yeast
1 1/2 cups of warm water
2 tbsp sugar
2 tsp salt
1/4 cup of olive oil
4 cups of flour (1/2 AP, 1/2 whole wheat)

Topping
a medium fennel bulb, sliced thinly
one onion, sliced
one bunch of swiss chard
bacon
goat cheese
home made ricotta

Ricotta
4 cups of whole milk
1 cup of heavy cream
2 tbsp of lemon juice

Instructions

In a large pot, add your whole milk and your heavy cream. While you are waiting for this to boil, add 2 packets of active dry yeast to the cup and a half of warm (about 110 degrees) water. This will need to sit for about five minutes before you do anything else. Once you see your milk start to develop foam on the top, watch carefully because it will begin to boil soon. As the milk begins to boil, add in two tablespoons of lemon juice and give one quick stir. Let rest for about two minutes. You will see curds have formed and at this point you can strain through cheese cloth or a fine mesh strainer. Let your curds separate from the whey and you will soon have ricotta! Depending on how stiff or moist you’d like your cheese, draining times will vary.

Now you can finish your dough. The water and yeast should have developed a slight foam on top, and at this point you can whisk in the olive oil, salt, and sugar. Once they are combined being to stir in your flour. If it gets to difficult to do with a spoon, feel free to get in there with your hands! You don’t want to overwork the dough at this point though, so once everything is combined, coat a new bowl with a touch of olive oil and put your dough in there to rise. Cover the bowl with plastic wrap and keep somewhere warm to rise and double in size.

At this point you can begin all of your chopping and rinsing. Slice your fennel thinly and caramelize- this will take a while, fennel is a strong veggie and needs time and patience to break down. Once they are soft and brown you can add in your sliced onion (I also added a splash of white wine!), and begin to cook it. Put the fennel and onion into a dish, and start to wilt your swiss chard- don’t even worry about washing the pan! While the chard is cooking down, throw a few pieces of bacon in a skillet and cook until crispy.

Once all of your toppings are ready, your dough should be good to go! There will be enough dough for a couple pizza’s- cut in half and save half the dough for later. Gently knead the dough on a floured surface and start to stretch to whatever shape pizza you’d like to make. For really thin crust I flatten out the dough even more with my rolling pin. Transfer your dough to a cookie sheet or pizza stone and throw on your toppings (for a vegetarian option, omit bacon)! I cooked my pizza at 300 degrees for about 15 minutes and then bumped the temperature up to 500 to finish off and get a nice crispy crust. I knew mine was ready when I could smell the pizza and when I looked in the oven, my crust was a golden brown!

I topped my pizza with some garlic powder, fresh parmesan, and salt and pepper. Divide up and enjoy!

Image

Image